
Visual Inspection of the Ignition Coil Housing and Surface
Identifying Cracks and Fractures in Ceramic or Epoxy Housing
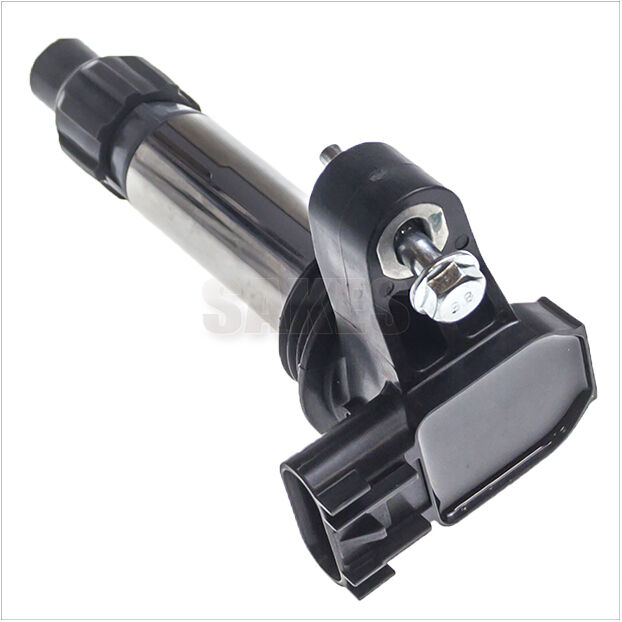
Start looking at the ignition coil housing when there's good lighting available. Those tiny cracks in ceramic parts usually come from heat changes or getting hit during installation, which weakens their ability to block electricity. When checking epoxy coated coils, pay special attention around where they attach to the engine and near the connectors. Any breaks here let water sneak inside and eventually short out the wiring. A decent magnifier helps catch those barely visible defects, particularly along the edges where pieces join together. Installing a cracked coil is asking for trouble since leftover electricity might jump across the gap and create sparks outside the unit, potentially damaging other components nearby.
Detecting Thermal Discoloration, Burn Marks, and Overheating Signs
Overheating manifests as distinct color changes on the coil surface. Look for:
- Bluish/gray discoloration on metal casings, indicating sustained high temperatures (>300°F/149°C)
- Brown or black scorch marks near high-voltage terminals, signaling electrical arcing
- Bubbled or melted epoxy, suggesting internal short circuits
Coils exhibiting these symptoms often suffer from degraded insulation resistance. According to SAE International’s 2024 diagnostic guidelines, thermal damage reduces coil output voltage by 40–60%. Compare suspect units against adjacent coils—asymmetrical discoloration confirms localized failure. Replace coils with burn marks immediately to prevent misfires.
Evaluating the Ignition Coil Boot and Secondary Insulation
Assessing Rubber Boot Deterioration, Micro-Cracking, and Elasticity Loss
Begin by removing the ignition coil boot and inspecting its rubber composition. Check for:
- Loss of elasticity: Stretch the boot gently. If it fails to rebound or feels brittle, ozone/heat degradation has compromised its sealing ability.
- Micro-cracks: Examine under bright light for hairline fractures near spark plug contact points. These allow moisture intrusion, causing arcing.
- Surface glazing: Shiny, hardened rubber indicates prolonged heat exposure (>200°F), accelerating insulation breakdown.
Oil contamination from leaking valve cover gaskets accelerates deterioration—swollen or sticky boots require immediate replacement.
Checking for Carbon Tracking and Internal Insulation Failure
Carbon tracking appears as thin, branching black lines along the boot interior or coil housing—evidence of high-voltage arcing through contamination. This occurs when:
- Conductive debris (road salt, metal dust) bridges terminals.
- Moisture pools in cracked boots.
- Oil leaks create carbonized paths.
Internal insulation failure often shows no visible signs. If misfires persist despite intact boots, use a multimeter to test secondary resistance. Values exceeding manufacturer specifications by >15% confirm insulation breakdown. Pro tip: Apply high-quality dielectric grease during reassembly to prevent future tracking.
Diagnosing Oil Contamination and Corrosion Sources Affecting Ignition Coil Performance
Tracing Oil Leaks from Valve Cover Gasket and Spark Plug Tube Seals
Most of the time, oil getting into ignition coil chambers comes down to just two main problems: bad valve cover gaskets or faulty spark plug tube seals. As these parts start to wear out, engine oil finds its way into those spark plug wells, where it coats everything including the base of the ignition coil and all those delicate secondary wires. What happens next? The oil basically becomes a shortcut for electricity, which causes voltage leaks, random misfires, and eventually burns out the coils faster than normal. If someone is checking this stuff out, they should definitely take off the coils and look inside those wells for any signs of pooled oil or that telltale shiny residue left behind by leaking fluids.
Look at those valve cover gaskets for any signs they're getting brittle or warped, particularly around the corners where the heat tends to do its worst over time. While we're on the subject, shine a flashlight on those tube seals too. Sometimes there are tiny tears that aren't obvious at first glance, but trust me when I say even the smallest crack lets oil sneak through eventually. It's generally a good idea to replace both these parts together because when pressure gets out of whack, it puts stress on both systems simultaneously. And don't forget to wipe away every last bit of oil residue from the coil boots and contact points before putting everything back together. Leftover grime creates carbon tracking paths where sparks can literally carve conductive trails right through the insulation material. Been there, done that, not fun at all.
| Inspection Focus | Failure Signs | Prevention Tip |
|---|---|---|
| Valve Cover Gasket | Oil pooling at corners, hardened material | Replace every 60k miles or during timing belt service |
| Spark Plug Tube Seals | Wetness inside tubes, swollen rubber | Use OEM-grade nitrile seals instead of cheaper alternatives |
Ignition coils exposed to oil suffer 3—faster insulation breakdown due to hydrocarbon penetration and thermal stress. Proactive replacement of these $15–$30 seals during routine maintenance avoids costly coil replacements and restores consistent spark delivery. Always verify torque specifications during reinstallation—over-tightening distorts new gaskets, recreating leak paths.
FAQ
What are common signs of ignition coil failure?
Common signs include misfiring, engine stalling, reduced gas mileage, and the check engine light coming on.
How often should ignition coils be inspected?
It's recommended to inspect ignition coils during routine maintenance, especially between 60,000 to 100,000 miles or if any performance issues arise.
Can oil contamination damage the ignition coil?
Yes, oil can lead to voltage leaks and coil damage by creating conductive paths for electricity.
What preventive measures can be taken for ignition coil maintenance?
Regular inspection for cracks, replacing worn gaskets and seals, and keeping components free from oil and debris are effective measures.