
Choosing the Right Radiator Fan for Your Vehicle
Matching CFM, Voltage, and Size to Engine Cooling Needs
When picking out a radiator fan, getting the airflow capacity (CFM), voltage compatibility, and size right for what the engine actually produces in heat is really important. For those high performance engines making over 300 horsepower, they generally need around 2,500 CFM or more just to stay cool enough. Regular cars on the road tend to work fine with somewhere between 1,500 and 2,000 CFM most of the time. Check what kind of voltage the car's electrical system runs on too. Most regular vehicles run on 12 volts DC, but big rigs and commercial trucks usually need double that at 24 volts. Space matters just as much as specs sometimes. Take measurements of the radiator itself and leave at least 5 centimeters of space between the fan housing and anything else nearby like belts or pulleys. If fans are too small or placed wrong, bad things happen when sitting still. Coolant temps can jump up about 15 degrees Celsius within just two minutes if there isn't enough air moving through the system.
Push vs Pull Orientation and Dual-Fan Configurations Explained
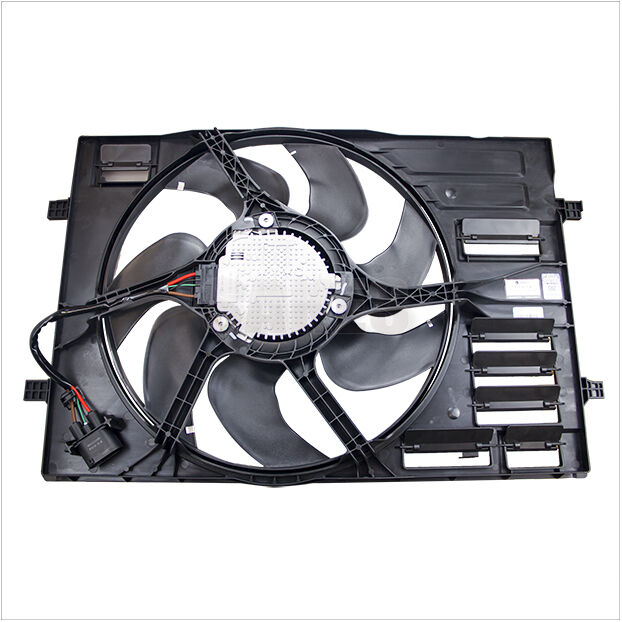
How fans are positioned makes all the difference when it comes to cooling performance. With push configurations, the fan sits right in front of the radiator forcing air straight through the core. Pull setups work differently by mounting behind the radiator and pulling air through instead. Most people find that pull arrangements tend to move about 10 to maybe even 15 percent more air in cramped engine compartments, although this only works properly if there's a good quality shroud installed to stop air from leaking around the sides. Engines that run hot, such as those found in turbocharged vehicles or trucks used for heavy towing, really benefit from having two fans working together. This setup offers backup protection against failure plus better overall heat management. Anyone thinking about putting in dual fans should remember a few basic installation tips before getting started.
- Synchronized activation via calibrated temperature sensors to avoid electrical overload
- Counter-rotating blades to eliminate turbulent air collision and pressure cancellation
- Balanced CFM distribution (e.g., 60/40 split for asymmetrical radiators)
Hybrid pusher-puller arrangements maximize cooling in extreme conditions but require robust relay wiring capable of managing 25–40 amp current draws—always follow OEM or reputable aftermarket wiring schematics from sources like Standard Motor Products for reliability.
Radiator Fan Installation: Mounting, Alignment, and Clearance
Pre-Installation Prep: Safety, Tools, and Radiator Access
Safety first is always the rule when working on vehicles. Put on those thick gloves that resist cuts and get some proper eye protection rated by ANSI standards. Before anything else, pop off both sides of the car battery to avoid any nasty shocks. Tools needed for the job include a good socket set, maybe a wrench too, along with regular screwdrivers (Phillips head and flat ones), a torque wrench for precision work, plus whatever tools help remove interior panels. Get rid of all the junk hanging around near the radiator area. Dust bunnies, loose bits of metal, anything that might block access should go. Make sure there's at least an inch or so free space between the radiator itself and whatever engine parts sit nearby. This little gap matters because air needs room to move properly through the system, which keeps temperatures under control while the engine runs.
Secure Mounting with Vibration Dampening and Airflow Clearance Checks
Mount the fan assembly using rubber isolators or manufacturer-approved brackets to absorb engine vibrations and extend component life. Tighten mounting bolts incrementally in a crisscross pattern to 8–12 ft-lbs (always consult your fan's spec sheet—some brushless models require lower torque). Critical clearance checks include:
- Fan-to-radiator distance: Maintain 0.5–1 inch to prevent blade contact during thermal expansion or vibration
- Hood clearance: Ensure ≥1 inch of vertical space with the hood fully closed
- Peripheral components: Confirm no interference with hoses, wiring harnesses, or AC lines
Manually rotate the blades post-installation; any resistance or scraping indicates misalignment. Improper mounting accelerates bearing wear and reduces fan lifespan by up to 70% per independent thermal stress analyses conducted by SAE International.
Wiring the Radiator Fan for Reliable, Temperature-Controlled Operation
Relay-Based Circuit Design, Proper Grounding, and Fuse Sizing
Relay circuits are pretty much essential if we want our radiator fans running safely and reliably over time. They keep those high current loads separated from the low amperage temperature switches, which stops those switches from failing early and acting all wonky when they activate. When picking out a relay, go for something like a 30 to 40 amp SPDT automotive model that can handle continuous duty without overheating. Grounding matters too! Connect directly to clean metal on the chassis, not just any old bolt head or painted area. Dirty connections cause voltage drops and make everything behave unpredictably. And don't forget about fuses either. Size them according to what the fan actually draws plus around 25% extra as a buffer zone. Let's say our fan pulls 10 amps normally, then we'd need at least a 12 or 15 amp fuse to cover unexpected spikes.
| Component | Specification | Purpose |
|---|---|---|
| Relay | 30–40A SPDT | Safely handles high-current loads |
| Fuse | Fan amperage × 1.25 | Prevents circuit overload without compromising protection |
| Ground Point | Unpainted chassis metal | Ensures low-resistance return path |
Undersized fuses blow prematurely under load; oversized fuses defeat their protective purpose. After installation, verify continuity at all connections with a multimeter—and confirm voltage drop remains ≤0.5V under full fan load. Consistent voltage delivery ensures accurate thermal sensor response and timely activation.
Testing, Validation, and Troubleshooting After Radiator Fan Installation
Testing after installation checks how things actually work in the field and finds problems before they get out of hand. Start by turning on the system and paying attention to any strange sounds or vibrations. Misaligned components or loose mounts can really eat into energy efficiency, sometimes making systems consume 15-20% more power based on those SAE thermal studies. Grab an infrared thermometer and check the temperature difference between the radiator inlet and outlet. At idle, we usually see around 15-25 degrees Fahrenheit difference as normal. When airflow seems weak, try bypassing the control system altogether by hooking the fan straight to the battery using some jumper wires. If it spins smoothly and quietly, the motor is probably fine. But if there's hesitation or grinding noises, that means trouble inside the motor housing. Those static pressure issues? They often come down to improper shroud clearances. Make sure there's at least an inch gap all around the edges when double checking. For ongoing overheating problems, grab a multimeter and test the coolant temp sensor against what the factory specs say. Broken sensors are responsible for delayed or missed activations in about two-thirds of the cases technicians see according to Bosch data. Keep a basic notebook recording ambient temps, when fans kick in, and how long they run. This kind of record keeping spots slow deterioration way before anything breaks completely.
FAQ
What is the optimal CFM for my vehicle's radiator fan?
The optimal CFM depends on your vehicle's engine performance. High-performance engines over 300 horsepower require around 2,500 CFM, while regular cars operate well within 1,500 to 2,000 CFM.
Is a push or pull fan configuration better?
Both configurations have their advantages. Pull configurations tend to move 10-15% more air in cramped compartments when correctly shrouded, but it depends on the setup and engine compartment space.
What safety measures should I take when installing a radiator fan?
Ensure you've disconnected the battery, use safety gloves, ANSI-rated eye protection, and clear the area around the radiator for safe and effective installation.
How do I ensure proper grounding for my radiator fan wiring?
Connect the grounding wire to clean metal on the chassis, avoiding bolt heads or painted areas to ensure low-resistance and reliable operation.